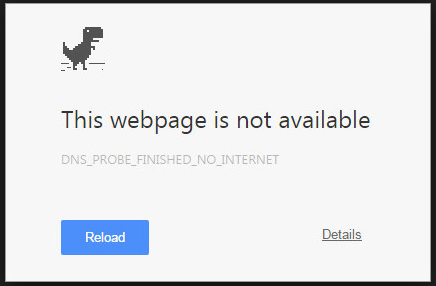
Have you been getting this error ‘DNS Probe Finished No Internet’ while browsing in the internet? This is quite frustrating when you have just started browsing in the internet for exploring. This error can be caused by various things and for such reasons it has several possible solutions. It can be tiring to try fix the error as it might appear many times if not well attended to.

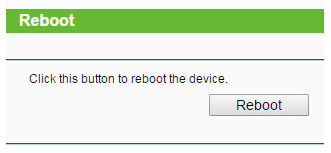
Research proved that the error can come from many sources. The error could be a problem due to several issues or even one issue at a time. For such reasons, the error becomes very hard to work on. Above all, as you fix the error ensure that the router default settings are not interfered with.
Why We Face This Dns_Probe_Finished_No_Internet Error
Some of the reasons as to why you may receive this error while browsing could be:
- Using a browser which is out of date.
- Wrong configuration of your DNS server settings.
- Using Network Update Driver which is not updated, outdated, broken, corrupted or completely missing the driver.
- Not clearing the cache of your browser.
- Poor internet connection
7 Ways To Fix This DNS Probe Finished No Internet Error
1. Use of Command Prompt
Commonly known as cmd. You can apply an easy command line and have the error gone. To achieve this, follow the steps below:
- Open command prompt in your windows through typing ii nth windows search section cmd then click on enter. You can as well opt to use ‘Windows Key and R’ then enter as shortcut keys to open the command prompt.
- Once cmd is opened, type or paste the code – netsh winsock reset
- Press on Enter then restart the PC.
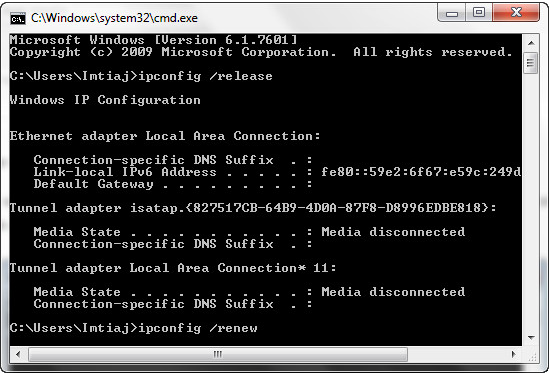
If that command line does not solve the error, it might be the IP address you are using which is causing the issue of connection. If that’s the issue, you can then release that IP address in possession and renew the IP to solve that issue.
- Open cmd again then type in the space ipconfig/release and press on enter.
- After the process is over, type again on the cmd ipconfig/renew and press on enter.
- Always remember to space forward slash and ipconfig.
Thirdly on using the command prompt, you can flush your computer’s DNS which could also be the problem cause.
- Open cmd either by searching or using the shortcut keys.
- Type ipconfig/flushdns then press on enter.
After running each of the above commands then restart the computer.
2. Changing to Open DNS from DNS Address
What you generally change with this method is the PC’s setting of obtaining addresses of the DNS server to just Open DNS. To achieve this:
- On the network icon on your PC’s right bottom click on it and then choose, ‘Sharing and Network Center.’
- Find LAN then click on the option and a new window with various options will be displayed, click properties.
- From the properties select IPV4 then click properties again.
- A new window will be displayed now click on the button ‘Use the following DNS server addresses.’
- On preferred server box enter 208.67.222.222 then on alternate server enter 208.67.220.220.
- Check in the box which requests you to validate settings when exiting.
- Click OK.
3. Configuring IP4/TCP Settings
Steps:
- Click on the start button then select settings
- Type in internet and network so as to navigate Network Connections
- A section of Wi-Fi will be displayed. Right click so as to display the Properties
- Choose IPV4/ TCP and choose properties
- Enter this in the section of preferred DNS server – 8.8.8.8 and on the Alternate DNS server enter 8.8.4.4
4. Updating the Network Adapter Driver
Mostly in Windows 10. This error could be as a result of problems with the network driver. For you to check if your network driver has gone out of date or is missing or is damaged or is corrupt, you can download a driver update reliable utility tool such as Driver Talent and the tool will detect automatically any network driver which has errors within seconds then download the updated version and install it.
Steps to use this method for resolving the problem:
- Scanning your computer
Run the tool which you have downloaded. Click on scan so as to begin full PC scan. If you are using Driver Talent, it will make a list of all missing, broke, corrupted and outdated drivers within seconds including your network driver if its faulty.
- Update or repair the Network Driver
By just clicking on the choice repair, you could also fix any faulty drivers detected. With Driver Talent, it will download automatically then install the network driver which best matches. With the same tool, you can as well click on update for updating the drivers. However, it’s not advisable to update if not broken because of purpose of stability.
- Rebooting the computer
The reboot helps the network driver update effect.
5. Clearing Google Chrome DNS Cache
Steps:
- Visit the link ‘chrome://net-internal/#dns.’
- A button called clear host cache will appear click on it.
- The website will continue working well as initially.
6. Disabling DNS Prediction Services
Steps:
- Go to Chrome settings
- Scroll down till you get toe Advanced settings then click on it
- You will note an option ‘Use Prediction Services to Load the Pages More Quickly’
- Uncheck that box with the option then restart the chrome browser
7. More Expert Solutions
Tips On How To Avoid This Internet Error
- Keep your browser up to date
- Ensure your drivers are up to date, not corrupt or broken or not missing.
- Ensuring the right configuration of settings of the DNS
- Ensure the chrome settings or the browser you are using are in order.
- Clear the cache of your browser frequently
The Final Words
It is never an exciting thing to receive the error DNS_probe_finished_no_internet error and especially in this current world where the connection is very important. This is a technical problem that must be solved.
The worst thing about these errors is the complexity in fixing as the causes are multiple and hence many solutions. What you have to do is give a try to each and every solution so as to determine which one will work for the issue. If all the solutions fail, you can now consult a professional.


