
Worst-case scenario you got this error on new brand pen drive, you can’t delete a file or folder on disk and/ or can’t format the pen drive (flash drive) or disk. To remove the write-protection or use another disk error, to format the pen drive (or flash drive) try one of the following methods.

If you already try format pen drive, diskpart, registry methods won’t work; skip other methods and try GParted tool method it’s working (tested) and hope, this guide may fix the issue about how to remove write protection on pen drive and flash drive.
4 Ways to Fix Remove Write Protection On Pen Drive Or Flash Drive Issue
To remove the write-protection or use another disk error, to format the pen drive (flash drive) or disk, follow the below methods;
- Format USB disk
- Registry “Storage Device Policies Write Protect”
- Disk part “attributes disk clear read only”
- G Parted Live tool
The above 4 methods to resolve the issue of write protection on disk; worst-case all the first 3 methods won’t work to remove the write protection on disk, the G Parted tool method working (tested) to remove the write protection on disk (pen drive or flash drive). Any how, i’ll explain you all the 4 methods here, learn it may be help you in different case issue.
1. Format USB Disk (Pen Drive or Flash Drive)
Formatting a disk or pen drive (flash drive) is pretty much easier and well know method of Windows users. Plug a disk (pen drive which have write-protection) and follow the below steps to format a pen drive (disk).
Open a This PC (previously My Computer), by press Windows and E keys altogether to open Windows Explorer.
You can see your plugged pen drive, right click on it and choose Format.
Leave the option as default and click Start.
Windows performs a Quick format the disk (it’ll takes some time to complete).
Upon successful disk format, Windows returns Format complete message or else error such as “Windows cannot format the disk have write protect“.
If disk format failed to remove the write protection means try the next method of registry method to set Write Protect as on Storage Device Policies key through registry editor.
2. Registry Storage Device Policies Method
To remove the write protection on disk by registry “Storage Device Policies Write Protect” method, follow the below steps;
- Open a Registry editor (regedit.exe) in administrator. (Note: Registry Editor is a tool intended for advanced users. Any wrong changes or deletion in it made damage to run Windows properly or failed to boot. Read Microsoft KB support article about How to Modify the Windows Registry.)
- Navigate to the following registry path; HKEY_LOCAL_MACHINE SYSTEM Current Control Set Controland select, Then create a new D WORD (32-bit) value named Write Protect, double-click on Write Protect and set its value to 0.

- Now plug a disk (pen drive) and check the remove write protection issue resolved.
If registry Write Protect and Storage Device Policies permission method failed to remove the write protection on disk means try next method of disk part command to remove the write-protection through run attributes disk clear read only command.
3. Disk Part Command Method
Disk-part is a command-line hard disk partitioning utility tool. For more information about disk part command, read the Microsoft KB article of Disk part Command-Line Utility. While use diskpart.exe commands on a disk, partition, or volume, make sure to execute on the object which you’re working. To remove the write-protection on disk by diskpart command method; follow the below steps-
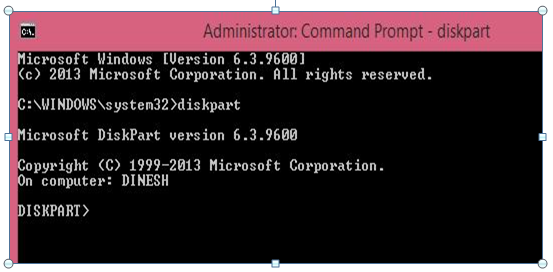
- Open the command prompt as administrator and type diskpart and press enter.
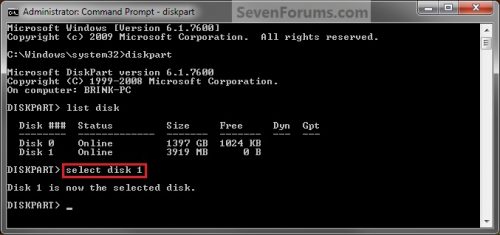
- Type list disk and press enter.
- List of connected disks to computer displays as disk 0, disk 1, disk 2 and so on; you can find pen drive (flash drive) by its size. (Note: Choosing wrong disk (other than issue disk) and proceed next steps leads severe damage to HDD or any other connected disk). For example, consider disk 1 is a issue disk of write protection (identified by its size). Refer below picture, disk 1 is 16 GB pen drive.
- Type select disk 1 and press enter.
- You got a message as “Disk 1 is now the selected disk.” Then type attributes disk clear read only and press enter. “Disk attributes cleared successfully” message returns if clear read only on disk (pen drive). To confirm the read only attribute cleared on disk or not, type detail disk command and press enter.

- Detail disk command returns details about the selected disk, you can see Read-only is set as No.
- Type exit to leave from disk part utility.
- Type exit again to close the command prompt.
4. GParted Tool Method
After trying all the methods of format, registry, diskpart failed to fix the remove write-protection on disk; finally try the Linux distribution format method. Download GParted tool and fix the write protect on disk issue on pen drive or USB flash drive. GParted Live is a small bootable GNU/Linux distribution for x86 based computers.
For other installations, please refer to the following external links:
To install GParted Live on CD/ DVD, download the GParted Live.iso file and burn it as an image to a CD/ DVD. To manually install the GParted Live on USB pen drive, follow the below steps;
- Download the G Parted Live zip file.
- Plug the USB flash drive and format it with a FAT 16 or FAT 32 file system.
- Extract the download GParted Live zip file to FAT16/ FAT32 partition on your USB flash drive. Make sure the USB flash drive root directory as GPL (for example, E:GPL).
- Reboot the Windows and boot in GParted live USB (Make sure USB boot enabled on BIOS settings; press F-10 to choose Boot menu), Once booted in GParted live, plug the defective USB drive (write protection issue pen drive) and format it.
- Once formatted the USB disk, unplug the pen drive. Restart the system and boot in normal mode. (Make sure unplugged the GParted bootable USB)
Alternatively, use Tux boot tool to create a GParted Live bootable USB disk. Even after try all the 4 methods, still have write protection issue on USB disk (or pen drive), let me know in comments section below.
Leave a Reply